How to convert billable hours to an invoice (without losing money)
Turn a timesheet into a clean invoice: review hours, apply rates by role, add expenses, state your rounding policy and terms, send, and follow up.

By Simon Dziak, Founder, Workspace369 · LinkedIn
Reviewed by Workspace369 product team · Product accuracy review
Workspace369 publishes this guide and its product is described as one of the paths below. The manual spreadsheet path is covered with the same care.
The gap between a finished timesheet and a paid invoice is where service businesses quietly lose revenue: hours left off, rates applied inconsistently, line items too vague to approve. This is the clean workflow for closing that gap — whether you use software that converts time automatically or a spreadsheet you run by hand.
Key takeaways
- The reliable chain is: track → review → rate × hours by role → add expenses → set terms → send → follow up.
- Clients expect the billing period, an activity summary, a rate breakdown, and your rounding policy on the invoice itself.
- Rounding time without a stated policy and vague line items are the two mistakes that trigger billing disputes.
- Workspace369 converts reviewed billable time into invoice line items on every plan from $29/month; a disciplined spreadsheet works too if you run it weekly.
What's inside?
Quick answerStep 1: Track time so it can survive reviewStep 2: Review the timesheet before anything is billedStep 3: Apply the agreed rates, role by roleStep 4: Add expenses and anything fixed-feeStep 5: Set terms the client can act onStep 6: Send, then follow up — every timeWhat clients expect to see on the invoiceThe mistakes that cost real moneyThe Workspace369 pathThe manual path, done properlyFinal recommendation
Quick answer
Review the timesheet for the billing period, mark what is billable, multiply hours by the agreed rate for each role, add expenses, state your rounding policy and payment terms on the invoice, send it, and follow up until it is paid. The whole loop should take minutes per client, not an afternoon.
Step 1: Track time so it can survive review
Conversion starts at capture. Every time entry needs three things beyond the duration: the client or project it belongs to, the task or activity, and a short note written for a future reader — the client — not for yourself. "Call" means nothing in three weeks. "Call: revised onboarding sequence after kickoff feedback" approves itself.
Timers beat memory. Reconstructing Friday's hours on Monday is how 20-minute tasks vanish, and those vanish from your revenue, not the client's bill.
Step 2: Review the timesheet before anything is billed
Never invoice raw time. Before the billing period closes, do a pass for:
- Entries missing a project, task, or note
- Non-billable work that slipped in — internal meetings, revisions caused by your own errors
- Duplicates from a timer left running
- Entries that belong to a different period or a different client
On a team, this review is the manager's approval step. On a solo operation, it is the difference between an invoice you can defend line by line and one you hope nobody questions.
Step 3: Apply the agreed rates, role by role
Bill rate × hours using the rate for the person or role that did the work — not one blended number, unless the client agreed to a blend. A senior at $150 and a junior at $85 on the same project should appear as two line groups, because that is what the client contracted for.
If you are setting or revisiting your rates, the hourly rate calculator works backward from your target income and billable capacity to the number you should be charging.
Decide your rounding policy here too, and write it down: 6-minute or 15-minute increments are common. The policy itself is rarely the problem in a dispute — applying it invisibly is.
Step 4: Add expenses and anything fixed-fee
Reimbursable costs die in the gap between the receipt and the invoice. Pull the period's expenses for the client — travel, materials, software bought on their behalf — onto the invoice as itemized lines with amounts and dates, not a single "expenses" lump. If the project mixes hourly work with a fixed-fee phase, keep them as clearly separated sections so the client can match each to the agreement.
Step 5: Set terms the client can act on
An invoice without explicit terms gets paid whenever the client gets around to it. State the due date, the payment window, and any late-fee policy on the document itself. If you are deciding on a window, our guide to net 30 payment terms covers when the standard month fits and when shorter terms protect cash flow. Then make paying frictionless: an online Pay Now option beats a bank transfer nobody schedules.
Step 6: Send, then follow up — every time
Sending is not the end of the workflow; payment is. Track the invoice's status, and let reminders go out on a schedule instead of from memory: a nudge before the due date, one on the day it passes, one a week later. Follow-up attached to the same client record as the work keeps the conversation factual — the invoice, the period, the line items — rather than an awkward email thread built from memory.
What clients expect to see on the invoice
Put yourself on the approving side of the desk. The person paying wants to verify, not investigate:
- Billing period — the exact date range the hours cover
- Activity summary — short, specific descriptions per line item, grouped by project phase or person
- Rate breakdown — hours × rate for each role, matching the agreement
- Expenses — itemized, with dates
- Rounding policy — the increment applied, stated plainly
- Terms and total — due date, payment window, and a running total that adds up without a calculator
An invoice that answers these on its own gets approved without a meeting. One that doesn't generates the meeting.
The mistakes that cost real money
Two patterns trigger most billing disputes. The first is rounding without a stated policy: the client's own math says 37.2 hours, your invoice says 39, and now the whole document is suspect — even if your rounding was honest. The second is vague line items: "consulting — 14 hrs — $2,100" invites a challenge that "14 hrs across kickoff call, audit, and findings workshop, Sept 1–12" does not. Close behind: mixing two billing periods into one invoice, and invoicing time nobody reviewed.
The Workspace369 path
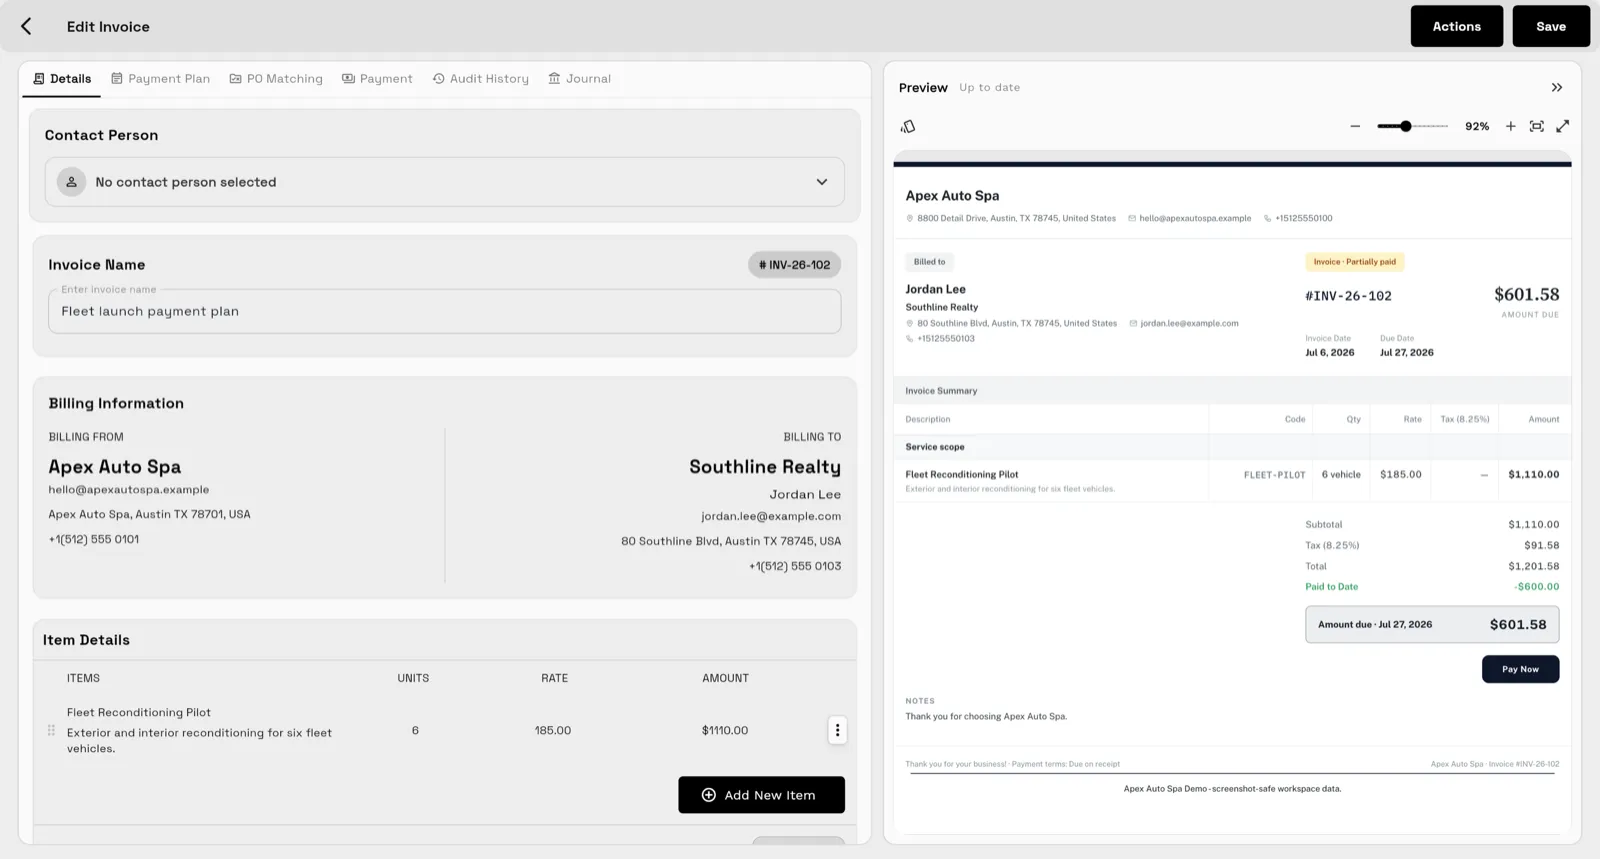
In Workspace369 the chain above is one system instead of a handoff. Timers, timesheets, and billable time tracking are available on all plans; you review the period in the timesheet, mark billable entries, and time-to-invoice converts them into invoice line items with the project context attached — on every plan, starting with Cadet at $29/month for one seat. The time tracking and invoicing software page shows the full loop, and our best time tracking with invoicing shortlist compares it with dedicated trackers.
The manual path, done properly
A spreadsheet can carry this workflow if you give it the discipline software enforces by default. One row per time entry with date, client, project, activity note, duration, billable yes/no, and rate. A fixed weekly review — Friday, before you forget the week. A pivot or filter per client at billing time that becomes the line items. And a hard rule: once a period is invoiced, lock it. Editing a timesheet after the invoice went out is how the two records disagree later.
Where the manual path breaks is follow-up and evidence: no payment status, no reminders, and no link between the line item and the underlying entries when a client questions a bill in month three. If you invoice hourly every week, that is usually when software earns its subscription.
Final recommendation
Whatever the tooling, the chain does not change: track with notes, review before you bill, rate × hours by role, itemize expenses, state your rounding policy and terms, send, follow up. Do it weekly and the invoice writes itself; do it monthly from memory and it writes your revenue down.
If you want the handoff automated, start a 14-day Workspace369 trial — time-to-invoice is on every plan from $29/month — or compare tiers on the pricing page.
Put it into practice
Run client follow-up in one workspace.
CRM, inbox, voice, invoicing, payments, projects, files, AI, and workflow automations — connected instead of exported.